Posted on

Hand Sanitizer Recipe – with 65% Alcohol

This recipe makes enough to fill 20 oz.

You can purchase dispensing bottles online like these from Amazon, and the recipe will fill all the containers. Make hand sanitizer for various rooms in your home or to share with friends and family.


Hand Sanitizer - with 65% Alcohol and Essential Oils

Alcohol Hand Sanitizer you can make at home. Effectively kills germs and bacteria and is the recommended disinfectant for preventing the spread of Covid-19.
Prep Time30 mins
Yield: 2 Bottles x 10 oz

Materials

  • 384 ml 99% Isopropyl Alcohol (65%)
  • 135 ml Aloe Vera Gel (23%)
  • 29 ml Sweet Almond Oil (5%)
  • 29 ml Glycerin (5%)
  • 5 ml Vitamin E Oil (1%)
  • 5 ml Essential Oils (1%)

Instructions

  • In a mixing bowl with a spout, add the Aloe Vera Gel, Sweet Almond Oil, Glycerin, Vitamin E Oil, and Essential Oils. Mix with a whisk, blending thoroughly
  • Slow pour the alcohol into the mixture. Continue whisking throughly. A creamy consistency will start to form. Whisk another few minutes and mixture will thicken
  • Using a funnel, pour the sanitizer mixture into the dispensing containers. Use a silicone spatula to scrape the sides and collect as much of the mixture as possible into the containers.
  • Seal the bottles with the dispensing cap. Bottles can be labelled and used immediately.

Everything You Need To Make This Hand Sanitizer At Home:

Isopropyl Alcohol

Aloe Vera Gel

Sweet Almond Oil

Glycerin

Vitamin E Oil

Essential Oils

Dispensing Bottles


Posted on

Cocoa Butter and Coffee Soap Recipe

This recipe makes a delicious, fresh and energizing soap! Using unrefined cocoa butter brings a natural chocolatey smell to the soap that is paired with roasted coffee essential oil, the vanilla notes of benzoin, and a subtle hint of jasmine for sweetness.

Cocoa Butter & Coffee Soap

With rich cocoa butter for a solid soap, scented with Coffee Essential Oil with Sweet Roasted Coffee and Vanilla notes
Prep Time1 hr
Curing Time28 d
Yield: 10 Bars

Materials

Lye & Water

  • 304 g Distilled Water
  • 131 g Pure Lye Crystals

Hard Oils

  • 294 g Coconut Oil
  • 92 g Unrefined Cocoa Butter
  • 83 g Shea Butter

Soft Oils

  • 147 g Olive Oil
  • 92 g Sunflower Oil
  • 92 g Canola Oil
  • 74 g Avocado Oil
  • 46 g Castor Oil

Herbal Additives

  • 4 g Coffee Essential Oil
  • 4 g Benzoin Essential Oil
  • 2 g Frankincense Essential Oil
  • 1 g Jasmine Essential Oil
  • 2 tsp Black Walnut Hull
  • 1/2 tsp Vanilla Specks
  • 1 tsp Cacao Nibs

Instructions

  • Gather all your ingredients and supplies so that they are easily accessible, and put on your gloves and safety equipment on
  • Weigh your lye in a container. Set aside.
  • Weigh your distilled water  in a BPA-free heat proof plastic pitcher (or other liquid). Set aside.
  • In a well ventilated area or outside, wearing goggles, mask and gloves, slowly add your lye to your liquid pitcher. Use a stainless steel mixing spoon and stir it slowly. Be careful not to splash any liquid. Continue adding lye little by little and mixing so that all the crystals dissolve. Set aside in a safe ventilated area that pets and children cannot reach, and allow to cool while you move on to the next step. 
  • Weight your hard oils (Coconut Oil, Shea Butter, Cocoa Butter), place in a saucepan and heat on low
  • Weight your soft oils in a pitcher (Avocado Oil, Canola Oil, Castor Oil, Olive Oil, Sunflower Oil), and set aside
  • Take your saucepan of hard oils off the heat once the butter is all melted. Stir in your soft oils, then check the temperature. The ideal soap making temperature is 110 - 130 F, and the oil and lye mix should be no more than 10 degrees difference (Ie, if the lye is at 120, the oil should be somewhere between 110 - 130 F.
  • Check the temperature of your lye. If it’s above 130 F, allow it to cool some more and check it again in 15 - 20 minutes.
  • Continue checking the oil temperature. If the oil cools too quickly, you can set it on the stovetop again for another minute with the thermometer in. Once your lye mix and your oil mix is within 110 - 130 degrees, you can slowly add you lye to the oil *** If you don’t want to mix them together in the saucepan, you can transfer your oil to a large BPA-free heat proof plastic mixing bowl****
  • Pour your lye into your oil slowly, and stir thoroughly with a silicone mixing spatula. Place your emulsion blender into the oil - lye mixture, and give it short bursts, stirring in an 8 movement. Occasionally you will want to use the silicone spatula to scrape along the sides and so some slow stirring. We want to reach trace slowly.
  • Once the soap reaches a light trace (not too thick!) you can the Black Walnut Hull Powder. Mix thoroughly.
  • Add your essential oils, stir thoroughly, and pour into the mold. Use the silicone spatula to scrape the edges of the bowl to get as much soap batter into the mold as possible. You can shape the top of your soap, or you can leave it flat. If you want a bit of texture, reserve 1/4 of the soap batter in the container, and use the emulsion blender to reach a medium-thick trace. This will make the batter thicker and easier to sculpt.
  • Decorate the top with vanilla specks and cacoa nibs, spritz the surface with alcohol to avoid soda ash from forming and set it aside to cure for 24 to 72 hours.
  • When soap is hard enough, loosen the edges of the mold, hold it upside down and apply gentle pressure to the bottom to release the mold
  • Cut the soap with a soap cutter into even bars. This recipe can make 10 - 12 bars. Measure for precise dimensions. Avoid using a knife, the slanted shape will make a straight cut difficult.
  • Allow soap bars to cure for 4 weeks, turning over every week to give each side a chance to cure. After 4 weeks the soap can be packaged and used.

Notes

Store soap in paper or cardboard. Avoid wrapping in plastic or airtight containers. Handmade soap should be kept dry and ventilated.
Use a soap saver or soap dish that drains to hold soap. This will extend the life of the handmade soap bar by allowing it to dry between uses.
Posted on

How To Make Cold Process Soap At Home

Just want the recipe by itself? Click here….

Have you ever wanted to make your own soap at home? Or have you ever wondered “What do I need to start soap making?” Here is a breakdown of everything you need to make your own homemade cold process soap in the comfort of your own home. The basic ingredients  you need to make your own soap is oil, lye and distilled water. Before I get into the recipe I’m going to go through all the basic ingredients you need to make soap and discuss the equipment and supplies you can use.

OILS

There are many oils you can pick up at your local grocery store. Food grade oils are good for cosmetic use as well. Common oils include:

Olive Oil

Sunflower Oil

Canola Oil

Avocado Oil

Coconut Oil

Shea Butter

LYE

You can purchase Pure Lye Crystals at any home hardware. Look for either the small container, or purchase a 3 gallon container of Pure Lye Crystals if you plan to continue making soap.

WATER

Make sure the water you use is distilled water. You will get better and more predictable results with distilled water. In more advanced recipes, you can substitute water for other liquids or even purees. Beer, milk, juice, and pureed fruit, can also be used in the soap making process, however these recipes will require precision in the timing and temperatures of these ingredients.

For this starter recipe, we’re going to use distilled water, a nourishing blend of carrier oils for a luxury body wash soap bar, and your choice of essential oils.

I have a kit of oils and butters available to make 1 soap loaf, but I also have links available if you want to purchase your own  products online in larger quantities. These are the best quality to price supplies and ingredients I found on Amazon. I get commissions for purchases made through links in this post. I will only endorse quality products that I would purchase myself and use in my own soap making process.

These oils are relatively economical in price and are easily sourced, but they are also a perfect blend for a face and body soap. It has a relatively high concentration of shea butter, giving it a creamy texture and moisturizing properties, but is also perfectly balanced with soft oils and hard oils making it solid and long lasting.

74g Avocado Oil 

92g Canola Oil

46g Castor Oil

294g Coconut Oil

166g Olive Oil

156g Shea Butter

92g Sunflower Oil

Equipment

The equipment you use in soap making is very important to making great soap. Not just in terms of quality, there are some materials that are not compatible with lye and soap making and should be avoided at all costs. This includes CHROME and GLASS.

Chrome will react with lye, and will even react with soap batter!

I once dropped a small amount of soap batter on a chrome electronic device. The spot where it landed was forever stained from the lye in the soap! 

Glass is also unsafe because of the high temperatures you are working with. Even tempered glass or Pyrex should not be used. They should only be used for baking purposes. A lye reaction can reach very high temperatures. And shattered glass on top of spilt lye is a huge semi-dangerous mess. Lye is incredibly corrosive, and it’s still corrosive when you first saponify your oils. 

When choosing equipment, opt for BPA-free plastic, heat proof silicone, and stainless steel.

Important soap making essentials for your kit


Soap Mold

Emulsion Blender

Silicone Mixers

Stainless Steel Bowls

Stainless steel spoons

Kitchen Scale

Measuring spoons

Heat Proof Measuring Containers

Heat Proof Pitcher Containers

Stainless Steel Saucepan

Mixing Bowls

Food Thermometer (It’s best to have 2 – 1 for oil, one for lye)

Other Useful Supplies and Materials

Spray Bottle

Alcohol (You can get this at your local pharmacy. Has very useful applications in soap making including sterilization and reducing soda ash on soap)

Parchment Paper 

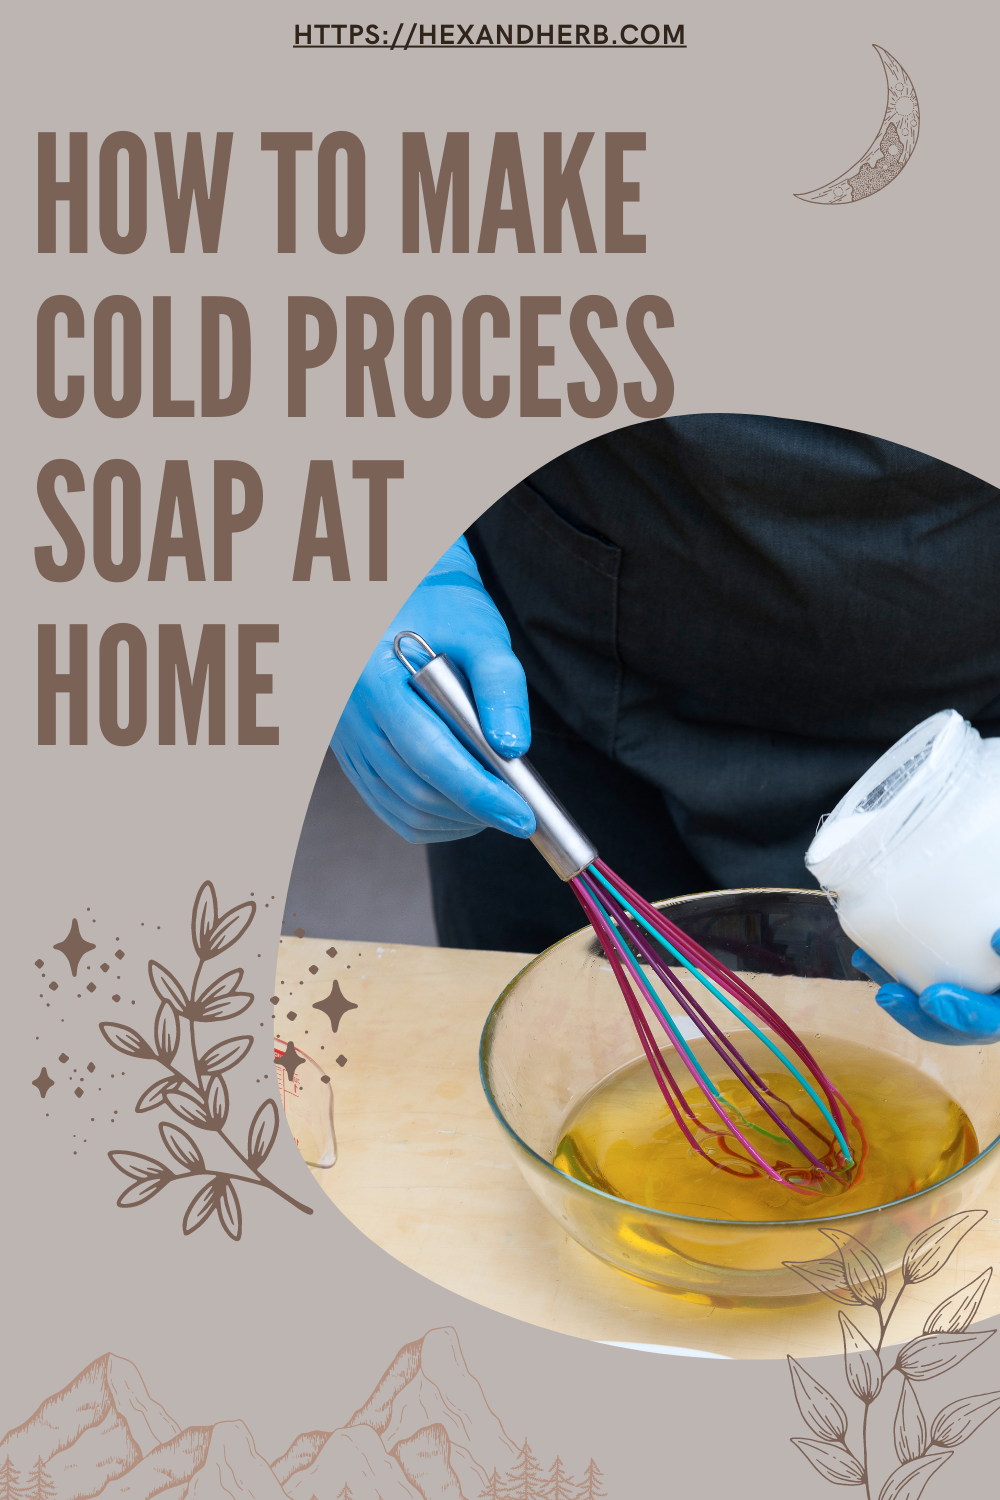
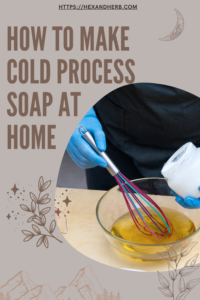
Stainless Steel Whisk

Vegetable Peeler (This is for beveling the edges of soap bars! This is entirely necessary and involves shaving the edges of the soap for a smoother edge. It’s more of a retail choice for me, and I love how smooth the soap looks when I do it).

Curing Rack 

Specialty Paper (For labels) 

Nitrile GlovesUnfortunately vinyl gloves are extremely difficult to come by these days. I’m sorry if this link expires by the time you read it, but suppliers have been selling out fast due to the glove demand during Covid-19.

Rubber Gloves – You can also use rubber gloves for soap making as well! They are just not as dexterous as nitrile gloves, but they will do the job and keep your hands safe. Just make sure to get the right size for your hands. It will make all the difference!

Goggles – You’ll need these when you’re mixing lye. It will create a rising vapor that you shouldn’t breathe in or allow in your eyes. Lye must be mixed in a well ventilated area, like outdoors!

Mask – Like gloves, it is also very difficult to get dust masks, but any face covering that will help to avoid breathing lye fumes will help. 

Now that you have all the equipment and ingredients you need to make soap at home, it’s time to get on with the recipe but first, some important precautions need to be followed for safety. Remember that lye is a corrosive material and can injure a human or animal if it is used in an unsafe or neglectful manner.

Don’t mix your lye and water around pets or children. If you spill anything on the floor and a pet or child steps on it, or worse puts something in their mouth, they can become very hurt as a result! Lye will corrode skin and it eats through some materials! Mix your lye and water outside, away from children and pets, and complete your soap making in an area they cannot reach for their protection. 

Always wear gloves when handling lye throughout the entire soap making process including cleanup. You should even wear gloves while you pour lye into a container. Pouring the crystals can cause some dust to rise up and if it gets on you hand or even your wrist if you’re wearing shirtsleeves, it will cause irritation, redness, and some itching. If this does happen, run the affected skin under cool water for a few minutes to thoroughly wash it away. I’ve definitely made the mistake of making soap with short sleeves, and I got a little bit of soap batter on my wrist above my glove, and it definitely caused some short term irritation.

Remember that it takes 4 weeks for soap to cure and fully remove the lye from the soap. Until it is fully cured, soap should not be used on the skin, and it can be very irritating if it’s used too early. After only 4 weeks the soap should be fully safe and is now an incredibly cleansing and nourishing bar of creamy sudsy soap. I like to wait 6-8 weeks before I put my soap on the shelf. This helps the soap reach a harder state so that it lasts longer when it’s used. 

The soap recipe needs to be followed exactly! Don’t make substitutions unless you’re using a soap calculator and balancing the properties of the soap oils so you get the soap the way you want. If you don’t fully understand the science of saponification and start substituting oils, you can easily reck a whole batch of soap. The balance of hard vs soft oils need to be such that the soap cures solid and has specific properties that make it a good face/body/hand soap. You can create your own recipes once you understand the balance between the properties of each oil when they saponify from the lye. It’s a very interesting craft, and there’s so much room for creativity, but specific rules need to be followed for soap to come together. We are creating a chemical reaction between oils and lye (aka sodium hydroxide), and we want to chemical reaction to turn out a specific way so we can get the perfect loaf of soap out of it!

And now on to the soap recipe. This recipe makes 1 loaf of soap, or 2 lbs / 10 bars, 120g each bar. They make beautiful unique gifts and this recipe base can be used to make a huge variety of soaps. I will make my own recipes available here as well. The essential oils and herbal additions can be customized to your preferences. The only thing that shouldn’t change is the base.

Pre-measured soap making oil and butter kit – $48

*Includes choice of 2 essential oils 5g each

*Makes 1 large loaf / 10 soap bars each weighing 140g.

Has all the ingredients you need to make soap except the water and lye.

304g Distilled Water

129g Lye – You can also get it on Amazon here

Shea Butter Body + Face Soap
With Lavender, Eucalyptus, and Vanilla Specks
Check out this recipe
Posted on

Shea Butter Body + Face Soap Recipe

This is one of my favourite go to base recipes for customizing new designs, scents and varieties. It is a perfectly balanced base that yields a wonderfully solid, sudsy bar with a creamy lather and moisturizing properties. There is a high Shea Butter content in this soap making it great for dry or sensitive skin. It is great for making moisturizing, nourishing, luxurious face and body soap recipes.

If you are new to soap making and would like to learn a bit more about the process, and the equipment and materials needed for this craft, check out my post Everything You Need To Make Your Own Soap At Home

You can also purchase the base oil and butter kit complete with essential oils and herbs in my shop!

Shea Butter Body + Face Soap

With Lavender, Eucalyptus, and Vanilla Specks
Prep Time1 hr
Curing Time28 d
Yield: 10 bars

Materials

Lye & Water

  • 304 g Distilled Water
  • 130 g Pure Lye Crystals

Hard Oils

  • 294 g Coconut Oil
  • 175 g Shea Butter

Soft Oils

  • 147 g Olive Oil
  • 92 g Sunflower Oil
  • 92 g Canola Oil
  • 74 g Avocado Oil
  • 46 g Castor Oil

Herbal Additives

  • 5 g Lavender Essential Oil
  • 5 g Eucalyptus Essential Oil

Instructions

  • Gather all your ingredients and supplies so that they are easily accessible, and put on your gloves
  • Weigh your lye in a container. Set aside.
  • Weigh your distilled water  in a BPA-free heat proof plastic pitcher (or other liquid). Set aside.
  • In a well ventilated area or outside, wearing goggles, mask and gloves, slowly add your lye to your liquid pitcher. Use a stainless steel mixing spoon and stir it slowly. Be careful not to splash any liquid. Continue adding lye little by little and mixing so that all the crystals dissolve. Set aside in a safe ventilated area that pets and children cannot reach, and allow to cool while you move on to the next step. 
  • Weight your hard oils (Coconut Oil, Shea Butter, Cocoa Butter), place in a saucepan and heat on low
  • Weight your soft oils in a pitcher (Avocado Oil, Canola Oil, Castor Oil, Olive Oil, Sunflower Oil), and set aside
  • Take your saucepan of hard oils off the heat once the butter is all melted. Stir in your soft oils, then check the temperature. The ideal soap making temperature is 110 - 130 F, and the oil and lye mix should be no more than 10 degrees difference (Ie, if the lye is at 120, the oil should be somewhere between 110 - 130 F.
  • Check the temperature of your lye. If it’s above 130 F, allow it to cool some more and check it again in 15 - 20 minutes.
  • Continue checking the oil temperature. If the oil cools too quickly, you can set it on the stovetop again for another minute with the thermometer in. Once your lye mix and your oil mix is within 110 - 130 degrees, you can slowly add you lye to the oil *** If you don’t want to mix them together in the saucepan, you can transfer your oil to a large BPA-free heat proof plastic mixing bowl****
  • Pour your lye into your oil slowly, and stir thoroughly with a silicone mixing spatula. Place your emulsion blender into the oil - lye mixture, and give it short bursts, stirring in an 8 movement. Occasionally you will want to use the silicone spatula to scrape along the sides and so some slow stirring. We want to reach trace slowly.
  • Once the soap reaches a light trace (not too thick!) you can start adding your herbs, colorants, essential oils, or doing other steps for customizing your soap. For this recipe, we will add some vanilla specks and essential oils. Add your botanicals/herbs first, stir thoroughly.
  • dd your essential oils, stir thoroughly, and pour into the mold. Use the silicone spatula to scrape the edges of the bowl to get as much soap batter into the mold as possibleYou can shape the top of your soap, or you can leave it flat. If you want a bit of texture, reserve 1/4 of the soap batter in the container, and use the emulsion blender to reach a medium-thick trace. This will make the batter thicker and easier to sculpt. Don’t over mix it, if it gets too thick it can start to seize and become unworkable
  • The soap top can be shaped slanted, in a mountain, rounded, etc. I like the mountain top shape of soap. It makes a really handsome looking bar. You can also top the soap with more herbs if you want. Lavender petals make a really nice soap topper. Poppy seeds, orange peel, flower petals, and other herbs can make really attractive soap toppers
  • Once you're finished decorating the top, spritz the surface with alcohol to avoid soda ash from forming and set it aside to cure for 24 to 72 hours.
  • When soap is hardened enough, loosen the edges of the mold, hold it upside down and apply gentle pressure to the bottom to release the mold
  • Cut the soap with a soap cutter into even bars. This recipe can make 10 - 12 bars. Measure for precise dimensions. Avoid using a knife, the slanted shape will make a straight cut difficult.
  • Allow soap bars to cure for 4 weeks, turning over every week to give each side a chance to cure.
  • After 4 weeks the soap can be packaged and used.

Notes

Store soap in paper or cardboard. Avoid wrapping in plastic or airtight containers. Handmade soap should be kept dry and ventilated.


Posted on

Revive + Re-Wax Your Beeswax Food Wrap • DIY Instructions

You can extend the life of your reusable food wrap by reviving or re-waxing them. You’ll know when it’s time to maintain it when you notice the wrap isn’t as sticky and pliable as it used to be. This is a great way to reduce waste and consumption while using all natural ingredients and materials in the process. I have pictures and and video below to share the process.

To revive your beeswax food wrap:

  1. Deep clean your wrap with hot water and dish soap and hang to dry.
  2. Heat oven to the lowest temperature, approximately 150 C.
  3. Lay wrap flat on a baking sheet and place in oven for 2 minutes.
  4. When beeswax has melted, remove tray and pick wraps up by corners.
  5. Hold up for a few seconds while wax hardens, then lay on a flat surface.

Re-waxing is an easy DIY process that you can do right in the kitchen. All that you need along with step by step instructions can be found below.

INGREDIENTS:

  • Old beeswax wraps
  • Grated beeswax (just a sprinkle for each sheet)

INSTRUCTIONS:

  1. Deep clean your wrap with hot water and dish soap and hang to dry.
  2. Heat oven to the lowest temperature, approximately 150 C.
  3. Lay wrap flat on a baking sheet and sprinkle grated beeswax on top.
  4. Place in oven for 2 minutes.
  5. When beeswax has melted, remove tray and pick wraps up by corners.
  6. Hold up for a few seconds while wax hardens, then lay on a flat surface.